In this article we will describe the steps necessary to create a new email account, adding email forwarders, configuring automatic replies and editing already created email accounts, in Plesk.
In order to access the Plesk control you will have to open a new browser window and type in http://domain.tld:8880 (non-SSL) or https://domain.tld:8443 (SSL), where "domain.tld" is your domain. For authentication you will have to use the username and password provided to you at the creation of your hosting account.
- In order to create a new email account follow the steps described at section 1
- For adding a forwarder to an email account please follow the steps described and section 4
- To add automatic replies see section 4
- To reset the password for an existing email account see the steps at section 5
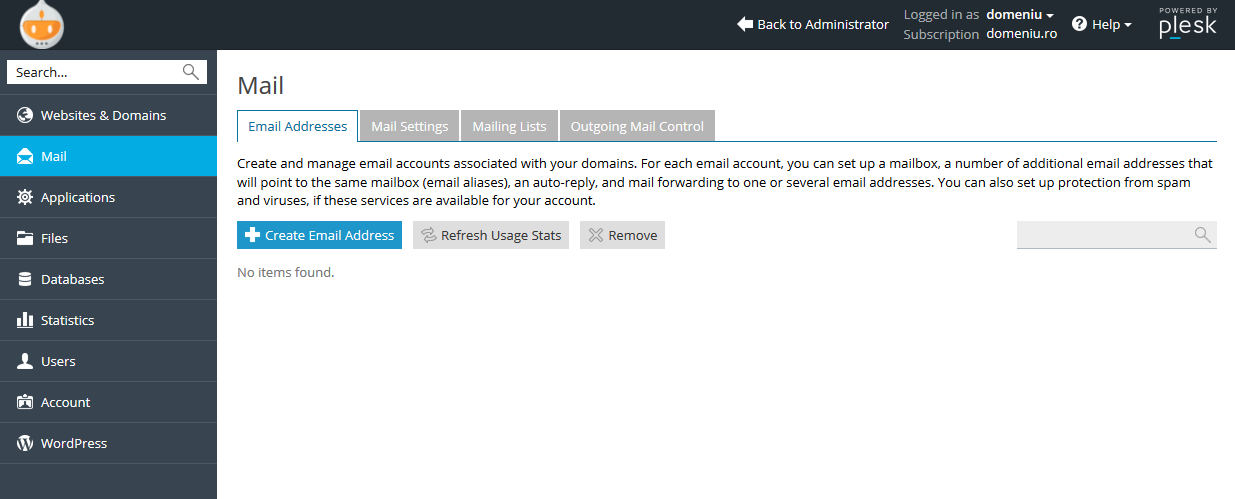
1. In order to create a new email account press the button 'Mail' on the screen you see after successfully logging in to your control panel.
If your account hosts multiple domains, select the domain you wish the email account to be created on.

2. Next, you will have to fill in the following information: The name of the email address you want to create, the password and the password confirmation. Alternatively, you can generate a random password by clicking on the 'Generate' button. The button "Show" will display the randomly generated password in order to copy it or write it down.
Optionally, by selecting "Another size", you will have the possibility to define the mailbox size limit. Press OK after you made sure the information you typed in is correct.

3. You will receive a message that the emaill address [email protected] was created.
To edit the email account or if you wish to add forwarders/automatic replies, just click on the email address.
Forwarding
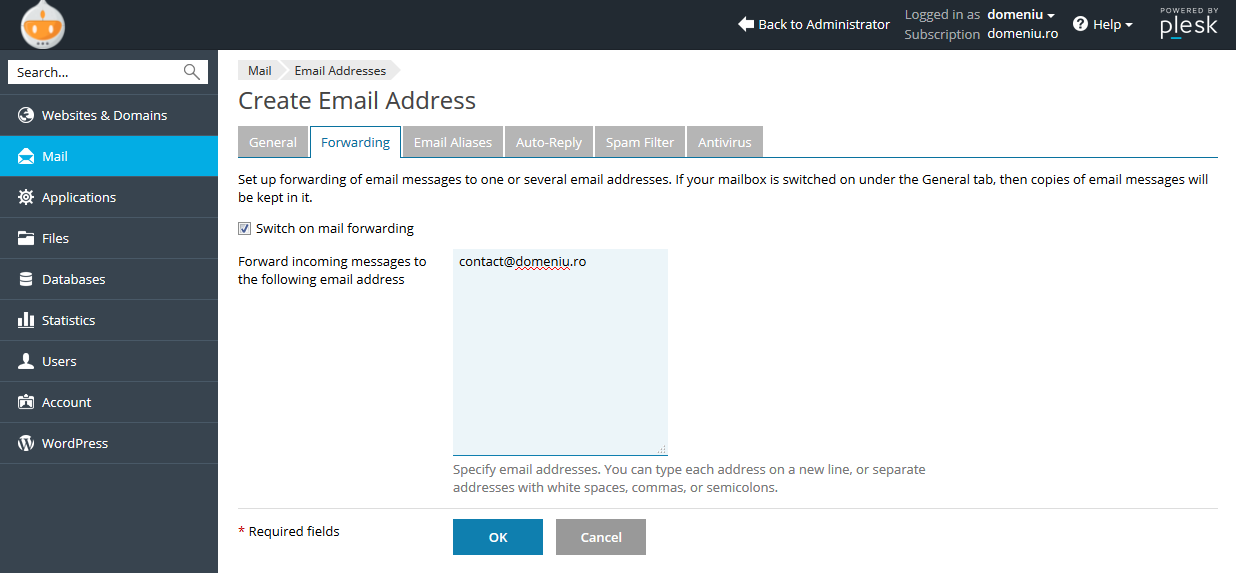
4. To create an email forwarder, select the 'Mail' tab, and the first screen then select the email account by clicking on it. After that select the 'Forwarding' tab.
Tick the check box located before 'Switch on mail forwarding', type in the email account to which the messages will be forwarded to. You can enter multiple email addresses, one per line. Finally select 'OK'

Auto-Reply
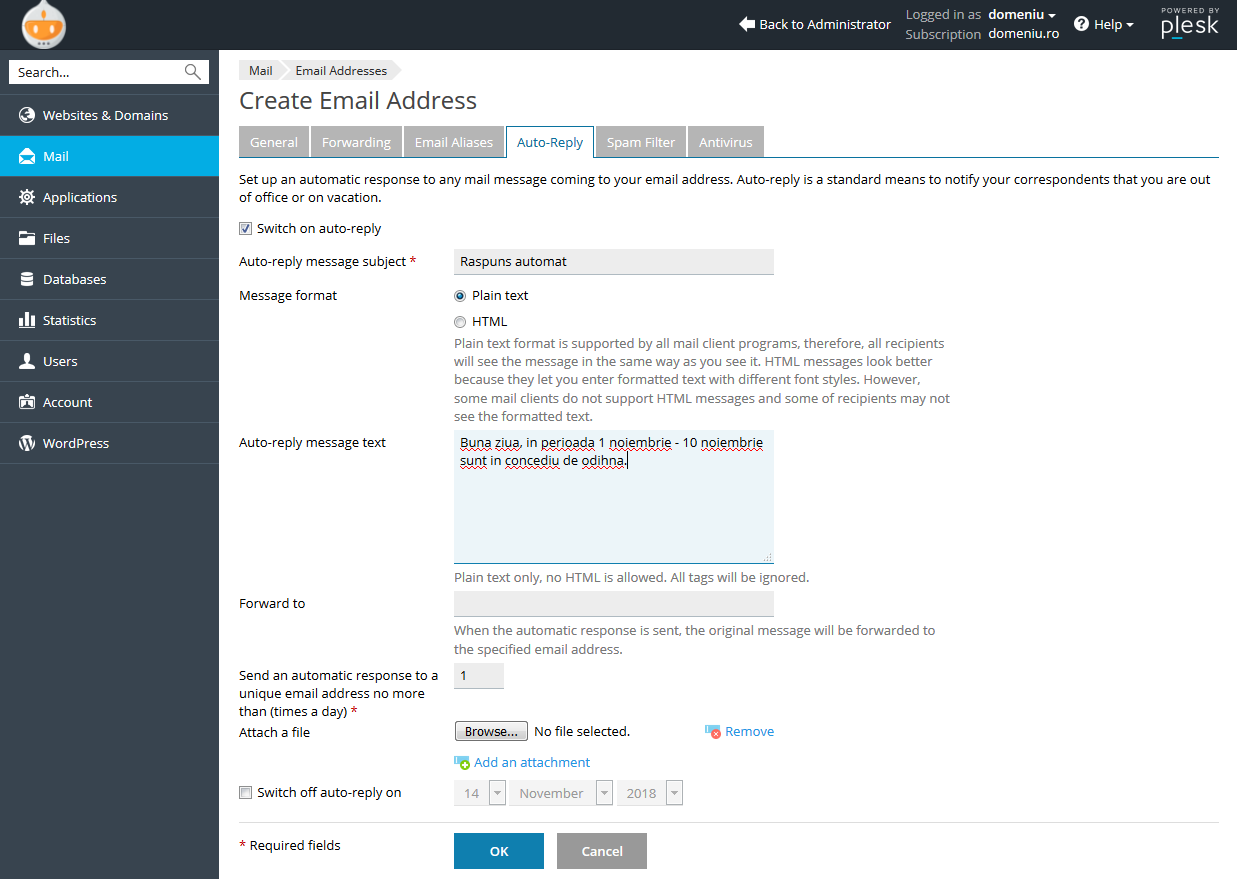
5. To add an automated response to an email account, select the tab 'Mail', at first window that loads when you log in, then select the email address you want by clicking on it and then click on the tab 'Auto-Reply' . In the new window loaded to set up an automatic response for the selected account, select 'Switch on auto-reply'.
6. In the field 'Auto-reply message subject' enter the message subject and in the field 'Auto-reply message text' enter the message itself.
If you send the message in HTML format and not text, mark the 'HTML' section Message format.
In the 'Forward to' field you can enter an email address where to redirect emails temporarily, while the automated reply is active (ie. Email a colleague, your personal email a.s.o). Emails will reach both destinations, meaning that the current email address and the one to which the redirection was made to.
You can also check the number of auto responder messages that can be sent per day to the same address. Default is once per day to the same email address. If you think you need more you can change this limit.
To activate the automatic reply, select 'OK'.

Change email account password
7. To change the password for an email account, select the tab 'Mail' at first screen that loads when you log in, then select the desired email address by clicking on it.
You can enter your new password in the Password and Confirm Password, or you can generate a random one. Select 'OK' to save the new password.

8. To delete an existing email account tab select 'Mail', at first window that loads after authentication. Then check the email address you want (left to the email address is a checkmark) and click on 'Remove'. Be careful not to accidentally select all emails.
